Videos / Foundation Disc Golf Videos
Form Foundations - Upper Body
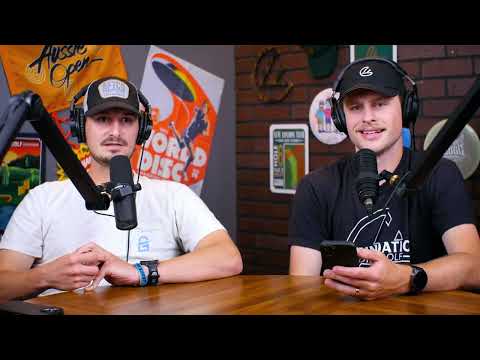
Watch on YouTubeHunter from Foundation Disc Golf continues his series on form foundations by focusing on the upper body and reach back technique for the backhand drive. For this video, he recommends using slower, more understable plastic to rework or learn proper form. He'll be working with a beat-up PA3, slightly beat-up M3, and F5. Building on his previous footwork-focused video, Hunter will concentrate on hip movement as he guides viewers through drills to improve their reach back and pull-through techniques. Hunter identifies two common problems with the reach back: using both hands on the disc, which limits range of motion, and not fully opening the shoulders. By releasing one hand from the disc, players can increase their reach and accuracy. Hunter will break down these issues and provide guidance on how to correct them, enabling viewers to refine their upper body positioning and ultimately improve their backhand drives.
Video Transcript
hey guys hunter here with foundation disc golf in today's video we're going to be continuing our series of form foundations and we're going to be talking about the upper body and the reach back and pull through for the backhand drive all right so as always i recommend whenever you're working on your form whether it's reworking or learning try to throw some slower more understable plastic i have a beat up pa3 a slightly beat up m3 and an f5 that i'll be working with today as if i was rebuilding my form as i walk you through these steps so in the last video we walked through the the footwork side of it and then i gave you a few drills we're gonna be doing the same thing but all these drills will be focused on your hips up so let's go ahead and first just kind of break down what should be happening with your upper body as you throw um the main part that we're going to be talking about is the reach back and then the pull through okay so the first thing we're going to talk about is the reach back the majority of you probably know that when you get into this position to throw your arm should be fully extended back okay the part that a lot of people get hung up on and that goes wrong is how you get to your position where you reach back so i'm going to talk about two main problems that i see and explain why you shouldn't be doing those and kind of what you should be doing the first problem that i see is people with two hands on their discs so you reach back and i have both hands on my disc right i'm in the right position you know i'm reached away from my target line which is this way and but i have both hands what's the problem here uh it's limiting how far i can reach back right so if i have both hands on my disc this is as far as i can reach back right if i let my left hand go like i'm supposed to and i should it allows me to open my shoulders more and push that disc farther back on the same line so now i'm here versus here all right so that's an extra you know five six inches on my reach back and it's farther along the same line that also aids getting my arm by my body when i start to pull through which will start my upper body rotation that we'll talk about in a little bit but as you've probably seen a lot of pros their arm comes down here and it's hard to get from here to this position without really messing anything up that causes a lot of movement that's unnecessary so those are the two reasons why your hand should get off of the disc the other issue i see with the reach back is people starting like this and then coming around their body to get to their reach back right now this one i think is the better of the two evils because you are at least getting one hand back right but in doing this look at all this motion i'm having the disc start here and then it's coming out and around and now it's back that means that there's a lot of room for error you know i could stop here and start my pull through and now my body is now facing to throw this way instead of what i'm trying to do which is throw this way so when you want it when you're coming around like this that's not good okay so that's mainly due to like i said you know there's a lot of different points you can start your pull through from it might be too high too low there's a lot of moving parts which means there's a lot that could go wrong so if you're right now you know coming around like this which a lot of amateur players do that's a very common mistake that's something you're going to want to fix and the correct way to do it to fix both of these problems is to when you start your run up you've probably seen paul do this you start with a little pump right and as soon as the disc is pumped you act like there's a stake through your disc okay so once my disc is pumped here it's not going to move this is where the disc stays okay then i move past my disc right and i push it into my my reach back so if i'm throwing this way i pump and then i run past my disc and now i'm fully reached back in the correct position but the disc didn't move the reasoning behind this is it allows it to be a consistent and b it makes your arm do exactly what you want to do on the pull through so i pump and then my arms at 90 degrees and then it slowly gets fully extended so that when i do pull through it's the exact same motion i just did so it's easier for your body to repeat that exact same motion okay so now you know kind of how to get into that position with the reach back all right but that's just step one so what you want the reach back to kind of reach its point here as you're planting your front foot okay so this is all kind of timing stuff but as your front foot's planting that's when you want your reach back to be here all right so once you get to this position now it's time to start to pull through now the pull through brings in a few different issues as well a few different common issues probably the most common is rounding so i'm gonna show this a little bit from a back angle here so if i reach back here my pull through i want to be on the same line like this right so the disc never leaves that line what a lot of people do is they have trouble getting their arm to this 90 degree position here right this is the position you want your arm in because that allows the disc to stay on the same line all the way through the flight so you'll see that is a straight line the whole way what a lot of players do is they start good and they finish good but in between their their arm might only bend like this angle here where it's like 120 degrees or something like that instead of the 90 that you want so when it gets here then when i turn it brings it offline you see that so if it's 90 it's online all the way through if it's not 90 it gets offline this is what players call rounding you know a lot of players will say i have trouble with rounding but some of them don't even know what that means they've just been told it that's what's that's what you're talking about when you say rounding right is so now i'm bringing it offline and obviously anytime the disc is line during your throw that's a bad thing you don't want that to happen because now what happens is if i come through and i'm offline and my timing happens to be off a little bit i could release here here here here all the way to here because i'm coming out it's coming offline if my disc is always online and my timing's off let's say i let go early and i release it here the disc is still going to move online because it's always been online it might just end up shorter than you wanted or if i hold on a second too long you know it might end up a little bit right in my line or something like that but it's not going to be nearly as drastic as if you're rounding so how do you get this pull through to be straight like you would want it um the main thing you want to focus on is leading with your elbow with your pull through so basically act like my line is here i'm going to try to elbow someone as i come through that's standing right next to me here okay so if i'm going to elbow them i don't want to go like this because that's not elbowing that's hitting my forearm i want to elbow them right so that means i'm here then i'm going to pull like this so that my arm gets to 90 degrees and then i lead with my elbow so now my elbow is pointing on my target line and then as my body turns because of the footwork that we talked about in the last video then as my body turns that allows my disc to come through on that straight line so that's what you really want to focus on right you reach back and then you want to get your arm to 90 degrees as you come through and then you know once you get to here it's just releasing the disc your body will know what to do once you get to a certain point because you'll have all the snap that's built up from the ground up from your footwork like the last video to the right 90 degree angle and then you turn and then you just throw and follow through which leads us to our next point so now you have the reach back you know you want to get to 90 degrees with some force like you're elbowing someone but then you know a lot of people still come through and have some like nose up finishes you know they might turn it too much or all this um there's two things here the nose up finish typically comes from a little bit of a dip okay so a lot of people will reach up high and pull through high but then the middle there's this dip so your follow through is high your reachbacks is high and so that causes the disc to come out nose up which then there's a lot of wind resistance underneath which is good for like little touchy up shots and stuff but if you're trying to get distance that's not a good thing you don't want that that causes too much resistance and then it'll stall and come backwards in the flight so the way to fix that is you reach through here and then your pull through in the middle you want about between your nipple and your belly button somewhere right in here okay that's where you want the pull through and in the follow through you want to be on the plane you're throwing so if i'm throwing a flat shot i'm going to run up my reach back's here my pull through is here and then my follow through is going to be here okay so that's all on the same plane if i'm throwing a hyzer i don't change this my reach through reach back and follow through everything stays the same what i change comes from my hips so if i'm throwing a hyzer the best way was ever taught to me is act like there's a hula hoop around you and you're trying to lean the hula hoop forward right it's on your hips so to lean it forward you have to bend forward how much you bend forward is how much height you're putting on the disc so if i'm trying to throw a hyzer this way and i lean forward then when i reach back now my disc is on hyzer i pull through my disc is on hyzer i follow through flat my disc is still on hyzer because i lean my body forward then my pull through my reach back everything stays the same as it did with the straight throw but now the disc will come out on hyzer it's the same thing with an anhyzer if i want to throw an anhyzer i lean back i act like i'm tipping that hula hoop backwards now that as i lean back i'm pulling through and the disc is on anhyzer the whole way my reach back and my follow through stay the same in relation to my upper body but my hips change the angle that i'm going to be releasing on so now we've basically covered you know everything from the reach back to the pull through to the follow through but that's just head knowledge so now i'm gonna break down and give you a few tips and drills that you can work on in a field just like this one to implement this into your game all right so the first drill we're gonna work on is working on getting your disc into the right reach back position all right so we talked about how you should act like there's a stake through your disc um i think there's two ways to do this drill right here i have a soccer goal just at the local field that i'm at something like this or a tree will work perfect or if you don't have that for some reason you're just out on the course and there's no trees where you live first off great that probably makes your life a lot easier secondly you can have a friend just hold the disc for you and hold in the same position and you do this exact same drill with them um but i'm gonna be using this post here so what i'm gonna do is i'm gonna start my x step and i'm gonna act like this post is where i pump to okay so i'm starting here i'm gonna pump and grab the post and then as i run through i'm going to hold on to the pose because the post obviously isn't moving or if you're using a tree or anything like that it's not moving um so this will kind of teach your body what to do so it'll look a little bit like this so you can see that's what i want my form to look like when i run up i'm going to pump as i make that first step and that gets my disc here where this post is then as i run by the disc is staying in the same position and now i'm fully reached back i'm fully extended and i'm ready to start my pull through and my disc is going to be online so that is the first drill um once you get that down work on this you know first start slow just kind of walk through it and get used to your body doing that motion you know make sure that you're getting your elbow to 90 degrees at the post as you reach back stuff like that you know focus on the little things and then slowly build up speed you never want to go full speed with this because your bot your body will have momentum and you can't pull so that might hurt your shoulder um once you get fully reached back and have that tension on it so you never want to go full speed with this but this is just a good visual representation for you for you to do at home to kind of see what i'm talking about you walking past the disc so do that a few times get used to it get comfortable with it and then we'll move on to the next drill all right so this next drill um is kind of named the beeto drill i don't uh it was taught by dan vito um there's a video of this on youtube but i'm gonna quickly kind of teach you it um so this is kind of working it's called working from the hip backwards right so what it is is it's gonna be working on getting your pull through right so you're just going to kind of start here um you want to start throwing this stand still um but you're going to start it right here in the middle of your chest you're focusing this way so this is like the middle of my pull through right so i'm going to start here and once you get the disc in this position 90 degrees arm flat you know focus on getting that right then you're just going to throw so i'm just stand here and i'm gonna just throw it should be pretty flat um and don't really worry about the distance just kind of worry about getting used to that feel just being able to throw it like that and throw it steady and smooth do that you know 10 15 times you want it until it just kind of feels right it feels comfortable it feels smooth once you do that then you're going to go from a little bit farther back not fully extended yet we're going like about here so i was right here i was about on my right pec now i'm going a little bit past my left pec and i'm still having my feet right i'm still doing the stand still and now from here i'm just do the same thing weight transfer and then just throw some be here and you'll notice i should be able to throw it farther that went probably about 40 50 feet farther just moving it from there to there and then do that until you get comfortable all right and this is all stands still still remember that so now i've done it here on my right pec i've done here on my left pec maybe a little past wherever it's a little bit more comfortable now you're going to start and you're going to reach back so i'm going to start in the reach back position so i'm throwing here i'm just going to put my disc here don't worry about anything else i'm putting my disc here and then i'm gonna just throw it okay so just focus on the pull through like you're elbowing someone as you come through and then this one should again go 50-60 feet farther and it should still feel pretty smooth yeah so all three of those are in pretty much a straight line out there about 50 60 feet farther each one once you do that and you get comfortable doing it with your you know just normal stand still the next step would be um adding in the reach back if i can grab another disc real fast it doesn't really matter which one all right perfect the m4 um so this one this is the final step in this drill you're just going to add in the reach back so you've done it here you've done it here you've done it here and i hope you noticed kind of what you're doing here is you're just mimicking the different steps and throwing from those different steps to get that muscle memory built up because more than likely if you're watching this video and you're working on something there's some part of your forum that's messed up and this is just breaking it down and just rebuilding it okay so now what you want to do is you're just going to throw a standstill again have your feet right from the last video if you watch the form uh the forum foundation's footwork video we did have your feet right for the standstill staggered and you're just going to start it here and then act like you're running past the disc so you're just going to push it back and then throw and once you add the reach back and the weight transfer i would imagine this disc will go probably closer to about 100 feet farther because you'll also be a little bit more comfortable and you would have just done it the correct way you know 10 20 30 times and now you're just kind of adding those steps in so let's see how this works all right so it came out a little bit low but that was just kind of me moving a little bit wrong with my feet but the upper body you just want to focus on pushing it back and then pulling through and make sure when you pull through your elbowing once you do that drill and you get comfortable then to move forward you're going to just start with one step so you're going to have your feet together just move one step forward and throw from your first chest you can throw me a disc you can move start with uh your feet together and throw like that um it'll feel really uncomfortable but again it's just working backwards so start with your feet together one foot forward and throw and then slowly build backwards i talked about that a little bit and like building your x step um so kind of those same drills that i talked about building your x step you know starting from throwing a standstill and then working in the x step add this drill to those um so if you haven't seen that video the link's probably in the description below and i'll try to put a card somewhere below me right here um so you can go watch that video on your footwork and find those drills but yeah add this drill to those and then that should help rebuild your form and then the next drill i'm going to teach is all about your release angle so the last drill i'll be showing you really isn't a drill at all it's just field work in the last video in this series we talked about throwing into a net that's great when you're working on just like basic little things in your form but once you have your reach back down you have your footwork down we're going to release another video talking probably about more about the hips and what your head should be doing during the throw but once you have the your upper body that we talked about in this video match with your lower body the majority of your form should be together and now you just need to get in a field so you can see exactly how your discs are flying i would recommend throwing uh more under stable plastic as i mentioned in the beginning of the video i'll be throwing all three of these um we'll throw some on this angle so you can kind of see the straightness of the reach back and then we'll throw probably one from the side angle so you can kind of see what the disc looks like when it's pumped out and then i walk past it um but yeah these are all three like i said at the beginning relatively straight discs we have a little bit of a tailwind might make it a little more stable but i'm gonna go ahead and throw the putter in the mid and then we'll switch the camera angles all right guys thank you so much for watching um as i mentioned if you want to watch the previous video or these future videos as they come out the form foundations please subscribe and also check out the playlist that we have i'll make sure i link to that in the description below it'll be called form foundations i should just have the footwork and this one in it and then like i said the next you know hips and then forehands and all the form videos that we're going to be doing on this channel if you want a chance for me to critique your form we're kind of testing this format out of me doing form critiques so we're going to have this as a contest all you have to do is be subscribed like this video and then comment down below saying something like pick me please or i'd like to fit i'd like you to fix this in my form we're going to pick one of those have someone email us a video of them throwing and then i'm going to do a form critique video to kind of talk about what you know you're doing wrong and the steps you could take to fix that we're going to use this like i said as a test format if it goes well we might start having that be a regular thing that we do once a month or something but if you want a chance for me to review your form go ahead and comment down below also comment if you have any suggestions for how we can improve our videos like this check out our store online if you want the merch like this shirt this hat or our great selection of discs thanks again guys for watching i'll see you next week